Shooting stars – nightscape photography in National Parks
9 January 2019
Photographer Pete Collins shares his tips for capturing the incredible dark skies of the National Parks! Get inspired and take part in our 70th anniversary photo competition today!
If you live in a city and look up on a clear night, you will be lucky to see more than a hundred stars, and you will have no chance of seeing the Milky Way. From our National Parks, away from towns and other sources of light pollution, you should be able to see around 3000 stars, and at the right time of year the silver river of our home galaxy the Milky Way reaching across the sky, made up of untold billions of stars too faint to make out individually.

Mars and the milky way over Tarn Hows in the Lake District National Park. Photo credit: Pete Collins
So how do you go about capturing an image containing starry skies when you’re out at night in the National Parks? Astrophotography of celestial objects like galaxies, nebulas, planets etc. can be a complex subject with a requirement for specialist equipment, but for nightscape photography – photographing a natural landscape with a starry sky backdrop – all you need is a digital single lens reflex (DSLR) camera fitted with a wide angle lens, and a sturdy tripod. Smartphones and compact cameras won’t really do the job as their small sensors generate too much digital noise (a grainy appearance of the image) when shooting in low light. You could also use a cable release to avoid disturbing the camera during long exposures, but using the 10 second timer on your camera can work equally well.
An important point to bear in mind when shooting the stars is that they are moving. The Earth turns on its axis once a day, 360°, so the stars appear to move in the opposite direction by the same amount, which works out at 1° every 4 minutes – that’s 2 full Moon widths! So if you’re shooting on a static tripod you need to limit the exposure time so that the star images don’t trail (unless you want to capture a star trails image!). With a wide angle lens (such as the 18-55mm lens that comes with many DSLRs, set at 18mm focal length),that means a maximum exposure of maybe 20-25 seconds.
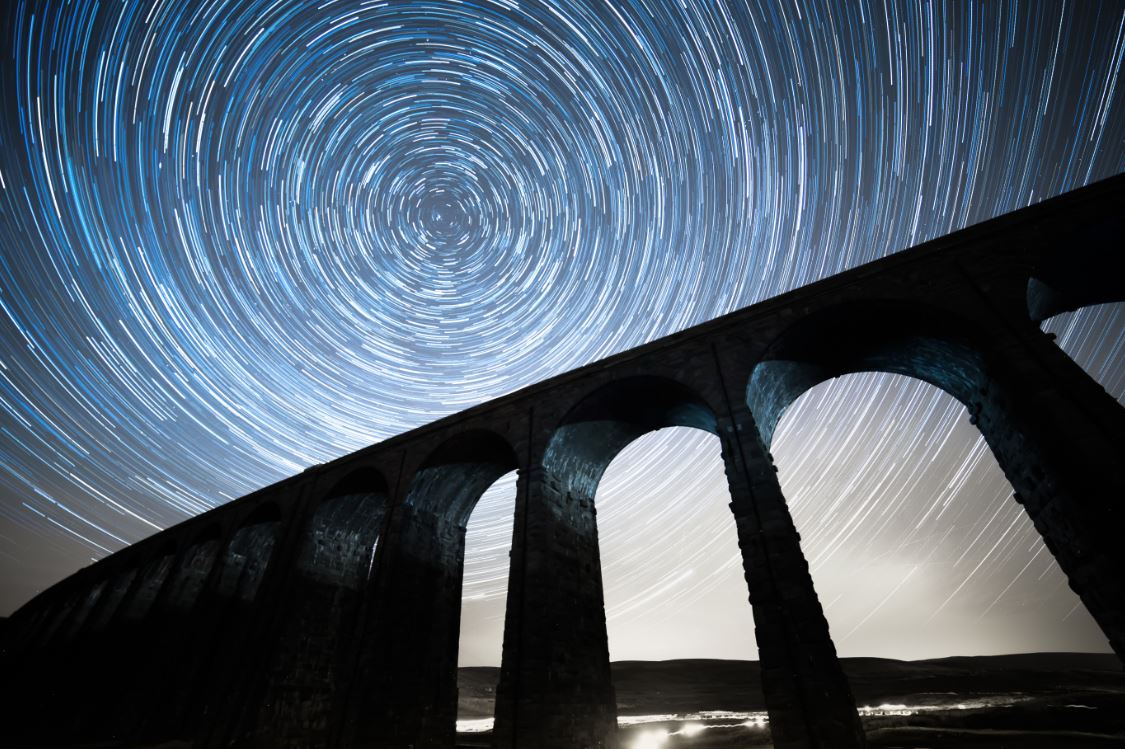
Star trails over the iconic Ribblehead Viaduct in the Yorkshire Dales National Park. Photo credit: Pete Collins.
You should shoot in manual mode with your lens aperture wide open to catch as much light as possible. Experiment with the ISO setting, which determines sensitivity of the camera’s digital sensor, to find a setting which does not produce too much digital noise in the image. This depends on the camera, but will probably be around ISO 800 to ISO 3200. Set your LCD screen to minimum brightness to try to avoid losing your night vision by looking at a bright screen. You should shoot in RAW file format, which gives you maximum control when editing your images.
Autofocus won’t work in the dark, so you need to focus manually. Switch off autofocus, find a bright star and use your camera’s Live View zoomed in to focus. Try a test shot of maybe 20 seconds, f2.8, ISO 800. Play back the image and zoom right in to check that the stars are in focus and showing as points, not trails. If they show as trails, reduce the exposure time; if they don’t, you could try a longer exposure time.

Think about composing the image says Pete Collins. Contemplating the universe from Yorkshire and the Milky Way over Ingleborough in the Yorkshire Dales National Park. Photo credit: Pete Collins.
Composing the view you want to shoot isn’t easy in the dark; you probably won’t be able to see anything through the viewfinder. You can either light up the scene with a torch, or take a series of test shots until you’ve got the framing you want. Take a look at the histogram of the image (which is a graphical representation of tonal values in the image – 0% brightness on the left, 100% on the right). Generally for a nightscape image, it’s best to aim for the ‘hump’ of the histogram (where lie the most pixels of a particular brightness representing the sky background and maybe the foreground) to be somewhere around 30 to 40%. Any more than that and the brightest stars are likely to be over-exposed with their subtle colours lost.
Exposure settings depend on the subject; for the Milky Way from a dark sky location maybe something like 20 seconds, f2.8, ISO3200. For stars only, you could try dropping the ISO to 800 or 1600 to avoid the brighter stars being over-exposed.
When it comes to composing your image, it’s worth trying to include some foreground interest (something like a tree, a stream or just a rock) which you could light up with flash, a torch – or moonlight. Nightscape images of a beautiful starry sky over a distant dark landscape in silhouette can be a bit boring!

Stars above Grasmere, beautifully captured in the Lake District National Park. Photo credit: Pete Collins.
Planning your shots carefully is worthwhile to get the images you want. You can find out what’s in the night sky at any particular time by using planetarium software like Stellarium, and times of astronomical darkness and phases of the Moon on the PhotoPills app and heavens-above website. An Ordnance Survey map and compass can be used to check shooting directions. You will often find that the night sky scene you want to capture, like the Milky Way or constellation of Orion, is only in the correct position relative to your planned foreground at certain times of year and times of night. And don’t forget to check the weather forecast – all your careful planning counts for nothing if it turns out to be cloudy!
If you want to shoot star trails, use a programmable interval timer and shoot a series of maybe 30 to 60 second exposures for at least an hour – the longer the better for nice long trails – then stack the individual frames in a free star trails program like StarStax.

Will you need to edit your photos? Orion over Malham Beck in theYorkshire Dales National Park and Tarn Hows in the lake District National Park. Photo credit: Pete Collins.
Your RAW images are ‘digital negatives’, and need editing in a program like Adobe Lightroom to bring out the best in them. Typical adjustments to make include exposure, colour temperature, lens corrections, contrast, shadows, whites and noise reduction.
To recap:
- Use a DSLR fitted with a wide angle lens or wide zoom setting and a tripod.
- Use a cable release (or the camera’s self-timer function).
- Shoot in manual mode, manual focus, RAW file format.
- Focus manually on a bright star, take test shots and check for focus and star trailing.
- Limit exposure to around 20 to 30 seconds unless you want star trails.
- Shoot with the lens wide open and a high ISO – probably.
- Plan – what’s in the sky, shooting direction, weather forecast.
- Edit RAW images in Lightroom or similar.
With a bit of practice you should be able to capture spectacular images to be proud of!
By Pete Collins,
to see more amazing work from Pete visit his website by clicking here!
T